The Transfer option in ALIS allows you to move a resident with their records from one community to another within your company.
Transferring a resident between communities in ALIS is a three-step process:
- Initiate the transfer of the resident from the originating community. This step labels a resident profile as ready to be transferred.
- Complete the transfer of the resident out of the originating community.
- Move the resident and their data into the new community.
Steps 2 and 3 above could be completed in either order.
Details about records transferred
- In all scenarios, the most recently completed or published records can be transferred with the resident to the new community. These records include all resident profile details including contacts, health profile details, insurance, etc., current medications, and evaluations!
- Older records will not transfer, and you will need to find them on the transferred out profile in the originating community, which can be found in the Moved Out tab of All Residents.
- It is notable that your Billing team will need to add new Recurring Charges to the new profile, and balances will not carry between communities.
Here is a list of some records that do not transfer between communities:
- Observation Notes
- Incident Reports
- Past MARs
- Records of orders that were Discontinued before the transfer
- Drug Count and order quantity records (only the current quantity will transfer)
- Past Compliance item completion records
- Past Evaluations and Service Plans
- Care Plan records
- Care Tracking records
- Recurring charges
- Billing records
- Calendar events
- Resident Leaves records
- Room assignment records
Step 1: Initiate transfer
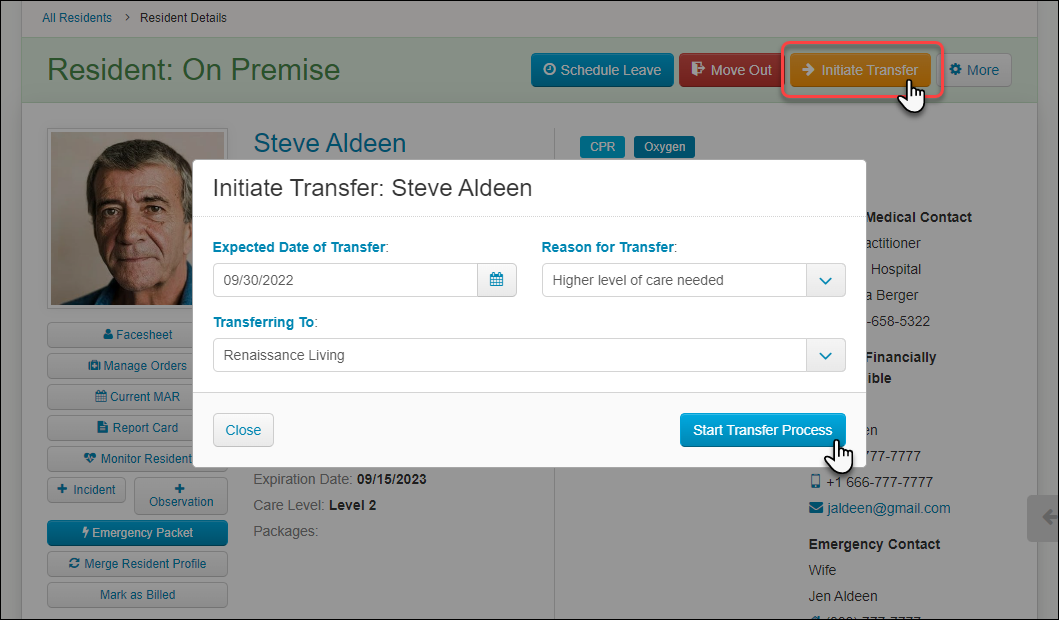
- On the resident's profile, click the Initiate Transfer button at the top right of the page.
- In the pop up you can update the date of the transfer, choose the reason for the transfer, and select the community where the resident is moving in the Transferring To menu. Click the Start Transfer Process button.
Step 2: Complete transfer out
- At the top of the resident's profile, a blue banner now displays to confirm that the transfer as been initiated. This can be canceled if there is a mistake. To complete the transfer out of this community, click Complete Transfer button.
- This opens a pane from the right side of your screen where you must confirm the details of the transfer and impact of moving them out of the originating community.
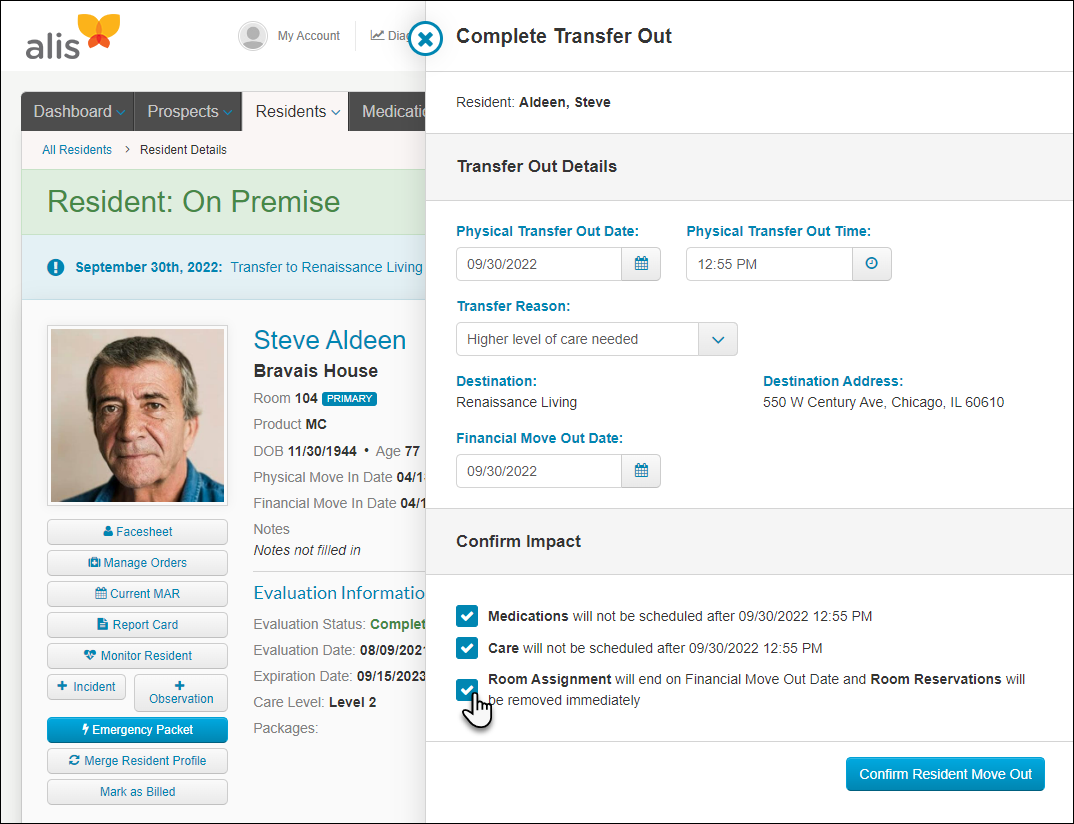
- Make the necessary selections and click Confirm Resident Move Out.
This profile page is now updated to a Transferred Out profile and can be accessed from the Moved Out section of the All Residents page. Read this article for more information about move-outs: Moved Out Residents.
Step 3: Complete transfer into the new community
- Go to the All Residents page for the new community.
- As soon as a transfer is initiated, the resident can be found in the Incoming tab of the new or 'Transferring To" community:
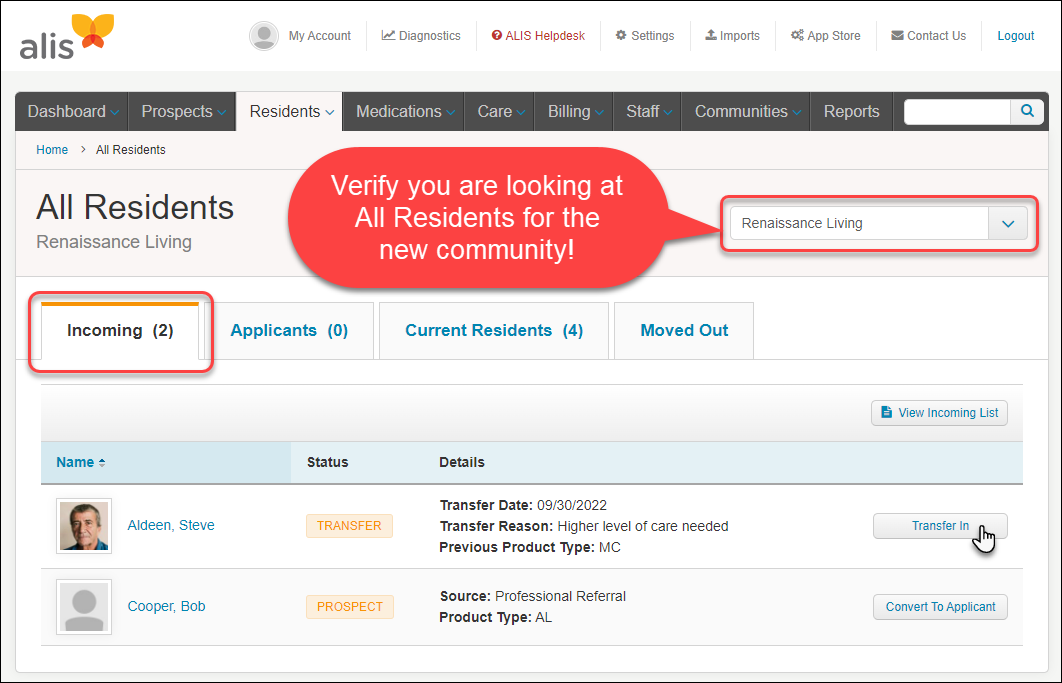 Note: If you can't find your resident in this tab, double check a couple of things: (1) Verify the transfer out of the originating community has been initiated, and (2) Verify that you are looking at the All Residents page for the new community.
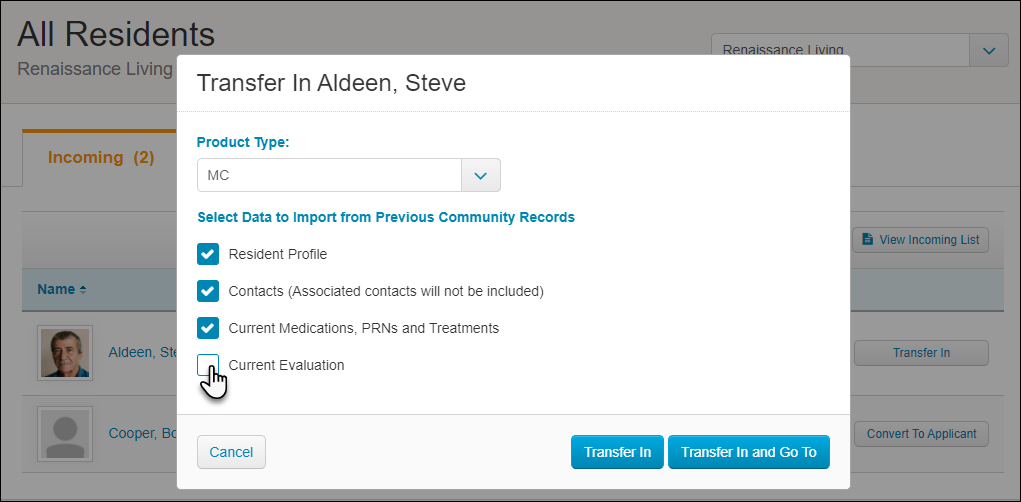
 - Click the Transfer In button to the right of your resident's name. This opens a pop-up where you confirm the resident's Product Type and select the information to copy over from the originating community. To create the resident as an Applicant in the new community, click Transfer In and Go To.
- You will then be taken to the Transfer Applicant Details page. In this Applicant stage, the resident is not yet marked as being physically in your community. Read this article for more information about Applicant profiles: Applicants and Resident Move-ins.
- If you chose to transfer compliance or evaluations, you must first Review Compliance or Review Evaluation steps before you can move in the profile as a Current Resident. If you follow the instructions below to complete these reviews, the Move In button will be available on the Applicant's profile.
- Click Move In at the top of the applicant's profile to confirm move-in dates, set the room assignment, and set the resident as On Premise at the new community.
Review Compliance
Click Review Compliance to jump to the Compliance section of the profile.
- This gives you a list of all the resident's completed compliance items from their previous community on the left, and if the same item exists in the new community, the same name will display on the left in the 'Map to an existing compliance item' column.
- If the same item isn't available in the new community, you can select from the menu to add it as a Miscellaneous Document.
When you are done mapping all documents, click the Transfer Only Selected Documents button at the bottom right. 
Review Evaluation
Click Review Evaluation to jump to the Evaluations & Service Plans section of the profile. Here you will need to verify the resident's Product Type and select an available Evaluation Reason.

Click the Transfer and Review Evaluation button to begin the evaluation review.
- This takes you to the complete evaluation page with all of the previously recorded answers filled in if the two communities have the same evaluation.
- You can review all details and fill in new information to make sure everything is updated. This will create new Evaluations and Service Plans records and help you to create a new Care Plan.
Related Articles:
Comments
0 comments
Please sign in to leave a comment.